heating FAQ
How To Clean Your Water Heater?
Short Answer: To clean a water heater: Turn off power, drain the tank, scrub interior to remove sediment, flush system with clean water, and refill. Regular maintenance, like checking the anode rod and pressure valve, extends its life and efficiency.
Maintaining a water heater is crucial for any household, yet it often goes overlooked until problems arise. A water heater works tirelessly, providing hot water for showers, dishes, and laundry, contributing significantly to a home’s comfort and functionality.
However, like any appliance, it requires regular maintenance to operate efficiently and last longer. Cleaning your water heater not only extends its lifespan but also improves its efficiency and safety. Over time, sediment and minerals from water can accumulate at the bottom of the tank, leading to reduced efficiency, corrosion, and in some cases, failure.
We put together this guide to walk you through the steps to properly clean your water heater, ensuring it continues to function effectively, providing you with the comfort and convenience of hot water when you need it.
Understanding Your Water Heater
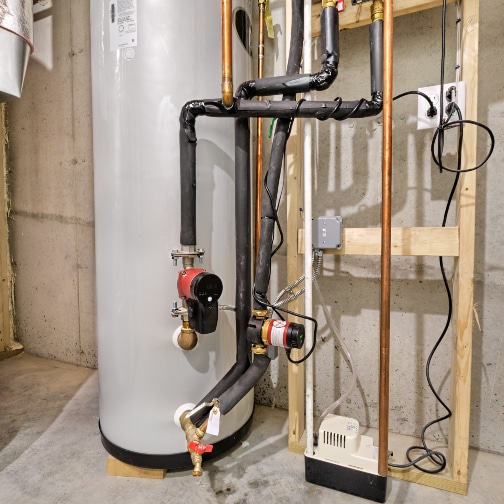
Before embarking on cleaning your water heater, it’s essential to understand its components and the type of water heater you have. Water heaters come in various types, including gas, electric, and tankless models, each with specific maintenance needs.
The common parts of a water heater include the flue pipe, hot water outlet, dip tube, drain valve, anode rod, thermostat, and temperature and pressure relief valve, among others. Recognizing these components helps in identifying maintenance needs and conducting thorough cleaning.
Types of Water Heaters
- Gas Water Heaters are known for their efficiency and rapid heating capabilities. Maintenance involves checking the pilot light, ensuring the gas line is intact, and keeping the exterior clean from dust and debris that could block the air intake or exhaust.
- Electric Water Heaters are appreciated for their simplicity and safety features. They require turning off the power at the breaker before any maintenance work to prevent electrical hazards. Regular flushing and checking the heating elements for corrosion are part of their maintenance.
- Tankless Water Heaters, while not requiring as much maintenance due to their lack of a storage tank, still need annual service to ensure that heating elements are free of scale build-up and the water flow sensor is functioning correctly.
Preparation for Cleaning
Before you begin the cleaning process, safety should be your top priority. Ensure the power to the water heater is turned off at the circuit breaker for electric models or set the gas control valve to the “Vacation” setting for gas water heaters. This prevents the unit from heating up or igniting while you’re working on it, reducing the risk of injury.
Gather Your Tools
You’ll need a few essential tools and materials for cleaning your water heater effectively:
- A garden hose to drain the tank.
- A bucket or a floor drain if available, to dispose of the water and sediment.
- Work gloves to protect your hands.
- Safety goggles to protect your eyes from potential splashes.
- A wrench for opening the drain valve or removing the anode rod.
- A long, narrow brush or a commercial tank cleaning wand (for scrubbing the inside of the tank if accessible).
Shut Off the Water Supply
Locate the cold water inlet valve, usually found at the top of the water heater, and turn it to the “Off” position. This stops more water from entering the tank as you drain it. Ensure all hot water taps in the house are turned off to avoid air entering the system.
Draining the Tank (Step-by-step)
Start by opening a hot water tap somewhere in the house to relieve any pressure in the system. Next, locate the drain valve at the bottom of the water heater. Attach one end of the garden hose to the drain valve and place the other end in a bucket or direct it to a floor drain if you’re draining a large amount of water.
Begin Draining
Open the drain valve. Water should start flowing through the hose and into your chosen disposal area. The water may come out slowly at first due to sediment blocking the flow. If the water doesn’t flow or is too slow, you may need to open the temperature and pressure relief valve slightly to allow air into the tank and facilitate draining.
Flush Out Sediment
Once the tank is empty, briefly turn on the cold water inlet valve to flush out any remaining sediment at the bottom of the tank. Watch the water coming out of the hose; once it runs clear, you’ve successfully removed most of the sediment.
Close the Drain Valve
After the water runs clear, shut off the cold water inlet valve and remove the garden hose from the drain valve. Ensure the drain valve is closed tightly to prevent leaks.
Cleaning the Interior of The Hot Water Heater
After draining the tank, the next step is to clean the interior to remove any lingering sediment or scale build-up. This step is crucial for restoring and maintaining the efficiency of your water heater.
Accessing the Tank Interior
- Remove the Anode Rod: Locate and remove the anode rod using a wrench. The anode rod is typically found at the top of the water heater and may require significant force to unscrew. Removing the anode rod provides access to the interior of the tank.
- Inspect the Anode Rod: Once removed, inspect the anode rod for excessive wear or corrosion. If it appears heavily corroded or worn down, consider replacing it to continue protecting the tank from corrosion.
- Scrub the Interior: Using a long, narrow brush or a commercial tank cleaning wand, scrub the inside of the tank through the opening where the anode rod was removed. Focus on areas where sediment is likely to accumulate, such as the bottom of the tank. This manual scrubbing helps break up and loosen any sediment or scale that wasn’t flushed out during draining.
- Vacuum the Sediment: If you have access to a wet/dry vacuum with a narrow attachment, you can use it to suck out sediment through the anode rod opening. This method is particularly effective for removing loose sediment after scrubbing.
Using Cleaning Solutions
For more thorough cleaning, especially in areas with hard water, consider using a vinegar solution to dissolve mineral deposits:
- Prepare the Solution: Mix a solution of water and white vinegar (typically, a few gallons of vinegar are sufficient for a standard-sized tank).
- Fill the Tank: Pour the vinegar solution into the tank through the anode rod opening. If necessary, use a funnel to avoid spills.
- Let It Sit: Allow the solution to sit in the tank for several hours, or overnight if possible, to dissolve the mineral deposits.
- Drain and Rinse: After the soaking period, drain the vinegar solution from the tank using the drain valve. Then, flush the tank with cold water through the cold water inlet valve to rinse out the vinegar and loosened deposits.
Flushing the Water Heater System
Flushing the tank is the final step in the cleaning process, ensuring that any remaining sediment or cleaning solution is completely removed from the water heater.
Reconnect and Flush
- Close the Anode Rod Opening: If you removed the anode rod or any other components, ensure they are securely replaced before flushing.
- Connect a Hose to the Drain Valve: Attach a garden hose to the drain valve and direct the other end to a drain or outside.
- Open the Cold Water Inlet Valve: Turn on the cold water supply to the tank to begin flushing the system. The fresh water entering the tank will stir up any remaining sediment and flush it out through the drain valve.
- Observe the Water: Watch the water flowing out through the hose. Initially, it may appear cloudy or contain sediment. Continue flushing until the water runs clear, indicating that the tank is clean.
- Close the Drain Valve and Remove the Hose: Once the water is clear, shut off the drain valve and disconnect the garden hose.
Restart the Water Heater
- Refill the Tank: Ensure the drain valve is closed and turn on the cold water inlet valve to refill the tank. Leave a hot water faucet open in the house to allow air to escape from the system.
- Restore Power: Once the tank is full and water flows normally from the open faucet (indicating no air in the tank), you can turn the power back on to the water heater or return the gas control valve to its normal operating position.
- Check for Leaks: After the water heater is turned back on, inspect around the tank, the anode rod, and the drain valve for any signs of leaks. Tighten any connections if necessary.
Reassembling and Restarting
After thoroughly cleaning and flushing your water heater, the final steps involve reassembling any parts you may have removed and restarting the unit to ensure it operates smoothly.
Reassembly Process
- Replace the Anode Rod: If you removed the anode rod for cleaning or inspection, now is the time to reinstall it. If the rod is heavily corroded or worn out, replacing it with a new one is advisable. The anode rod plays a crucial role in preventing corrosion inside the tank.
- Secure All Connections: Make sure all components, such as the temperature and pressure relief valve and any access panels, are securely reattached. This ensures the water heater operates safely and efficiently.
- Refill the Tank: Before turning the power back on, ensure the tank is fully refilled with water. Open the cold water supply valve and allow the tank to fill. Keep an open faucet in the house to release any trapped air in the system. Once water flows normally from the faucet, the tank is full.
Restarting the Water Heater
- Restore Power: For electric water heaters, restore power by turning on the circuit breaker. For gas models, turn the gas valve back to its normal operating position and relight the pilot light if necessary.
- Check for Proper Operation: Once the water heater is powered on, monitor it for any unusual noises or leaks. It may take some time for the water to heat up initially. Verify the temperature setting on the thermostat to ensure it’s set to your preferred heating level, typically around 120°F to 125°F for energy efficiency and safety.
- Perform a Safety Check: Test the temperature and pressure relief valve by lifting the test lever and letting it snap back. Water should flow freely from the valve and stop when you release the lever. This test ensures the valve operates correctly to prevent excessive pressure build-up.
Maintenance Tips
Regular maintenance is key to extending the life of your water heater and ensuring it operates efficiently. Here are some tips to keep your water heater in top condition:
- Annual Inspection: Conduct an annual inspection of your water heater, checking for leaks, corrosion, and proper operation of the thermostat and pressure relief valve.
- Flush the Tank Regularly: Sediment build-up can reduce efficiency and damage your water heater. Flush the tank every 6 to 12 months to remove sediment, depending on your water hardness.
- Check the Anode Rod: Inspect the anode rod every 2 to 3 years and replace it if more than 50% worn. The anode rod protects the tank from corrosion.
- Adjust the Temperature: Keeping the temperature set to 120°F helps reduce energy consumption and prevents scalding. This setting is adequate for most households’ hot water needs.
- Insulate Older Units: Insulating the tank and hot water pipes can improve energy efficiency, especially in older water heaters. Use an insulation blanket and foam pipe insulation for this purpose.
Conclusion
Cleaning and maintaining your water heater is an essential aspect of home upkeep that ensures a reliable supply of hot water and extends the life of your appliance. By following the detailed steps for cleaning, flushing, reassembling, and restarting your water heater, you can improve its efficiency and prevent potential issues down the line.
Regular maintenance, including annual inspections and sediment flushing, further contributes to the water heater’s longevity and performance. Investing time in these maintenance activities can save you money on energy bills and avoid costly repairs or replacements in the future. Remember, safety first—always take appropriate precautions when performing water heater maintenance.